Planting Lettuce and Tomatoes

planting lettuce
Putting the soil in the “pots”.

It’s that time of year again and I just got started planting this years crop. Up here in Machias, the ocean causes winter to linger well into late April (we just got 3 inches of snow on Saturday), but I got started planting my indoor stuff.

Friday afternoon I planted lettuce, and today, I did my tomatoes.

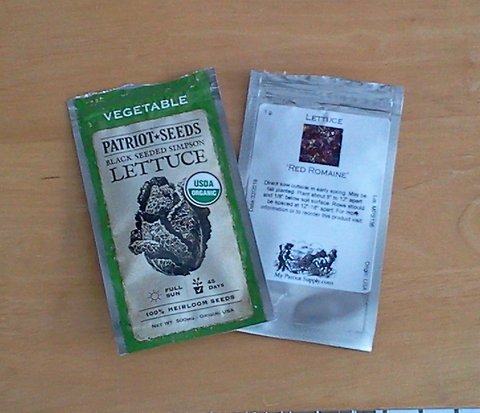
As you know from my “Ordering Seed for the Kitchen Garden post” I like to plant Black-Seeded Simpson and Red Romaine lettuce, because they grow well here in zone 5a and because I like their taste. Also, the Black-Seeded Simpson grow in long leaves that make excellent sandwich wraps. There’s nothing better than a tuna melt with pickles and tomato wrapped in a succulent Black-Seeded Simpson leaf.

Lettuce seed
Black-seeded Simpson and Red Romaine lettuce seed packets

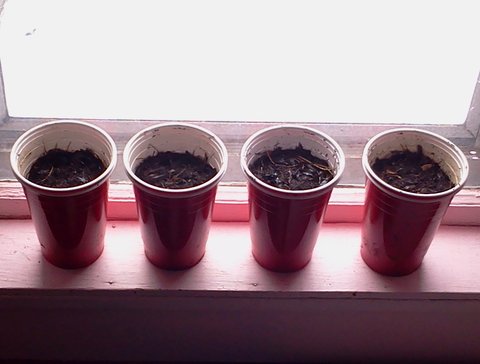
I put two seeds of each variety into into four pots for a total of eight seeds. I will thin when I transplant them into the garden in a few weeks. If all goes well I should get two Simspson and two Romaine plants for the garden. I do this every month (with Bloomsdale spinach too) and it keeps me in greens for the whole summer.

Planted lettuce seeds
Lettuce seeds in the pot and on the window sill.

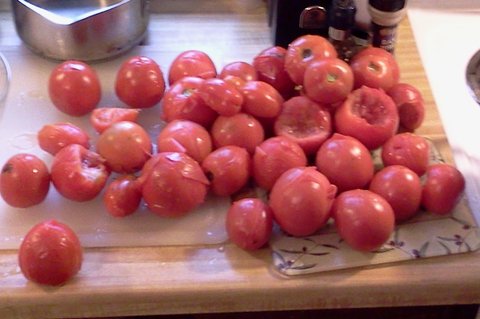
Today, I planted 48 tomato seeds, also two to a pot. 38 Beafsteak in 19 pots and ten Roma plum tomatoes in five pots. I’ll also thin them when its time to transplant, and should get 24 plants total (19 Beafsteak and five Roma). I like to eat the Roma, in salads and as slices on sandwiches; I usually use the Beafsteak to make pasta sauce.

Tomato seed packets
Beafsteak and Roma tomato seed packets

I used compost for both and red Solo cups as pots. I don’t like to use plastic, but I can’t find anything I like better. I punch five tiny holes in the bottom of half the cups with a thumb tack and then place each one of them in another cup, without holes. It creates a leak-proof “pot”.

Just planted tomato seeds
24 pots of just planted tomato seeds on the planting rack.

I plant all of the seeds about 1/4″ deep and, of course, I’ll keep them wet, until they sprout, and then water them more deeply as time passes, before transplanting them. Also, the tomatoes won’t sprout unless the potting soil is above 70 degrees fahrenheit, so I keep them in the sun or on a small heating mat, when the sun’s not out.

For more thorough planting and harvesting instructions, see My Patriot Supply’s excellent guides:

Making a Basic Tomato Sauce

tomato-sauce-in-the-jar
Basic tomato sauce — in the jar

I was out of town for a few days last week and while I was away we got a light frost, killing all my tomato vines, so I was stuck with about 20 lbs worth of ripened tomatoes that had to be dealt with. I decided to sauce ’em, but after doing a bit of research learned that it was unsafe to can them in the traditional way — due to low acidity of tomatoes on dead vines. (To learn more about canning tomatoes and tomato products, safely, see the USDA’s Complete Guide to Home Canning.) Fortunately, after putting a few of the best ones in the fridge for eating, a few not quite ripe tomatoes on the window sill for further ripening, and tossing a few that had gone bad in the compost I only ended-up with about three quarts worth of sauce, which I could easily fit in my freezer.

This recipe is for a very basic sauce for long-term storage — just tomatoes and a little lemon juice to raise the acidity for safety reasons. I like to add the rest of the ingredients for a pasta sauce (beef, onions, peppers, spices, etc.) at cook time.

Ingredients:

  • 16 1/2 lbs. of tomatoes
  • 3 oz. of lemon juice

Equipment:

  • Two 6-quart stock pots
  • One large bowl
  • One smaller bowl
  • Slotted ladle
  • 2 1/2 lbs. of ice
  • Sharp knife

Process:

Fist I cleaned the tomatoes and removed any stems.

tomatoes-cleaned
16 1/2 lbs. of tomatoes just cleaned

Then I added approximately two-and-a-half quarts of water to one of the 6-quart stock pots, put it on the stove and brought to a boil.

After which I sliced an “X” in the bottom of each of the tomatoes and removed the stem ends along with any rot spots I found.

tomatoes-prepped-for-saucing
Tomatoes with the bad spots removed and “X”-ed on the bottom

Then I added the ice to the second stock pot and just covered with cold water.

Once the water in the first pot began to boil, I started adding tomatoes, four at a time, and let them sit for about 30-60 seconds, then removed them and placed them in the ice bath until cooled. Once cooled I placed them in the large bowl. This loosened the skins making the next step much easier. I did this with all the tomatoes.

tomatoes-ready-to-peel
Tomatoes after they’ve been blanched and cooled — you can see the peels ready to come off

This process made the skins very easy to peel off. I was able to grab loose skin at the “X” and start peeling. I put the peels in the small bowl (to make a tomato paste). If you don’t plan to do that just toss them in the compost.

Once all tomatoes were peeled, I emptied the boiling stock pot and started breaking-up the tomatoes into smaller chunks and placed them in the pot. I adjusted the heat until  the sauce just barely bubbled and let them simmer until the sauce reached the consistency that I like. It took about five hours and I would estimate that about a quart or so of water was boiled out.

tomato-sauce-start
Tomatoes ready to simmer on the stove-top

Then I added the lemon juice, ladled the sauce into three quart jars, and placed in the freezer. Can’t wait to make my first pasta with it.